Introduction
Hey there! Have you ever wondered how chemists separate complex mixtures into their individual components? Or maybe you’ve heard of column chromatography and want to know how it all works? Well, you’re in the right place! Column chromatography is one of the most powerful tools in the lab for purifying compounds and separating substances. But setting up your column correctly can make or break your experiment.
In this guide, I’m going to walk you through everything you need to know about setting up a column chromatography experiment. By the end, you’ll not only understand the essentials but also get some handy tips that’ll make your process smoother and more effective. Ready? Let’s dive in!
What Is Column Chromatography
Before we jump into the setup, let’s make sure we’re on the same page about what column chromatography actually is.
This technique involves a column (typically a glass tube) filled with a stationary phase (usually silica gel or alumina), through which a solvent (the mobile phase) is passed.
The sample mixture is loaded into the top of the column, and as the solvent flows down, different components of the sample move at different speeds, getting separated along the way.
What makes column chromatography so awesome is its versatility. You can use it to purify a wide range of substances, from organic compounds to peptides. But the key to success? A well-set-up column.
The Key Components of a Column Chromatography Setup
Setting up a column chromatography experiment might sound a bit intimidating at first, but it’s all about getting the right components together and assembling them in the correct way. Let’s break down the essential pieces you’ll need.
Glass Column
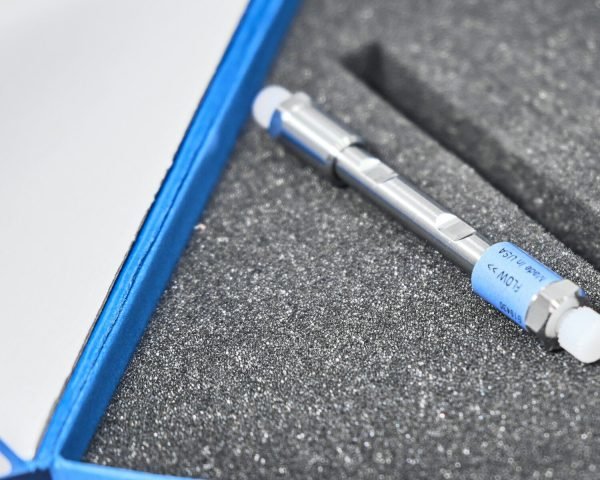
The heart of any column chromatography setup is, of course, the column itself. Typically made of glass, it comes in various sizes and lengths depending on the volume of sample you’re working with. The column should be clean and free of any previous residues, as these can contaminate your new sample.
Did you know that a wider column might slow down the process but could provide better resolution? What do you think about using a wider column? Have you noticed better separation results with one?
Stationary Phase (Silica Gel or Alumina)
Next, we need the stationary phase. This is the material that’s packed into the column and where the separation actually happens. Silica gel is one of the most commonly used stationary phases, but alumina (aluminum oxide) can also be used depending on the nature of the sample.
The stationary phase is key because it interacts differently with the various components of your sample, making them move at different rates down the column. The “right” stationary phase for your experiment depends on the nature of the compounds you’re trying to separate.
Mobile Phase (Solvent)
Then there’s the mobile phase, which is the solvent or solvent mixture that helps carry your sample through the column. The mobile phase has a huge impact on how quickly each compound moves and how well they separate. Solvents like hexane, ethanol, or acetone are commonly used, and the choice depends on the polarity of the sample you’re working with.
Have you ever experimented with different mobile phases to see how they affect separation? Some people find that adjusting the solvent mixture can significantly improve the resolution!

How to Set Up Your Column
Alright, now that we’ve got the pieces, let’s talk about setting everything up. Here’s a step-by-step guide that you can follow for a successful column chromatography run.
Step 1 – Prepare Your Column
Start by cleaning your glass column thoroughly. You don’t want any leftover contaminants from previous experiments affecting your results. Once it’s clean, attach a stopcock at the bottom of the column to control the flow of your solvent.
Step 2 – Add the Stationary Phase
Now, it’s time to pack the stationary phase into the column. If you’re using silica gel, make sure to hydrate it beforehand, and use a slurry (a mix of silica and solvent) to pack it in. You want the stationary phase to be packed evenly to avoid any air bubbles or gaps, which can disrupt the flow and the separation process.
Step 3 – Layer Your Sample
Once the stationary phase is packed in, it’s time to load your sample. This is where things can get a little tricky. You want to make sure your sample is dissolved in a small amount of the mobile phase so it doesn’t disrupt the packing material too much.
One trick is to layer the sample on top of the stationary phase gently. Don’t pour it in directly; you want to avoid disturbing the silica gel layer. A smooth, even sample application will lead to better separation.
Step 4 – Add the Mobile Phase
Now that your sample is loaded, you can begin adding the mobile phase. This is where the magic happens! As the solvent moves through the column, it will carry different components of your sample at different rates, based on their affinity for the stationary phase.
It’s important to keep the column packed and to add the mobile phase slowly and consistently. Don’t rush it! The slower you go, the better your separation.
Troubleshooting Common Column Chromatography Problems
Like any technique, column chromatography doesn’t always go according to plan. But don’t worry; I’ve got you covered with a few tips for troubleshooting common problems.
Problem 1 – Poor Separation
If your components aren’t separating well, it could be because of a few reasons. Maybe you didn’t choose the right stationary phase, or the mobile phase isn’t quite right. Try adjusting the polarity of your solvents or re-packing your column with more care.
Problem 2 – Slow Flow
If the solvent is moving too slowly through the column, there could be air bubbles or blockages in the packing. Try gently tapping the column to dislodge any air pockets. Also, make sure you’re using an appropriate flow rate for your sample size.
How to Improve Column Chromatography Efficiency
Once you’ve got the basics down, you might want to improve your efficiency and results. One way to do this is by optimizing the solvent system. Try mixing solvents with different polarities to see which gives you the best separation.
What about your own experiments—have you experimented with mixed solvents before? What’s worked best for you?


Conclusion
Column chromatography is a fundamental technique used in labs to separate compounds based on their different interactions with a stationary phase. It’s widely applied in various fields, including biochemistry and chemical analysis. The setup of a chromatography column involves selecting the right column size, preparing the stationary phase (typically silica or alumina), and ensuring that the column is packed properly to achieve optimal separation.
The process can vary depending on the method used, such as dry-packing or slurry-packing, each offering its own set of advantages. The choice of packing method impacts the efficiency and resolution of separation. Once the column is packed and ready, the sample is loaded, and solvents are carefully passed through to separate the components.
This method allows for the isolation and purification of specific compounds, which is crucial in research, pharmaceutical applications, and chemical production. Proper column preparation and an understanding of the different chromatography techniques are key to achieving successful outcomes.
Do you have any questions, or have you tried column chromatography before? Let me know in the comments—I’d love to hear about your experience!
Here are some articles and resources that I referenced for your requested search on chromatography and its techniques:
- Biology Insights – Ion Exchange Chromatography
This article provided a comprehensive overview of different chromatography techniques, including ion exchange chromatography. It explains the principles behind separation methods and how they are applied in research labs for purifying biomolecules. - ChemGuide – Column Chromatography
This article breaks down the practical aspects of column chromatography, including how columns are set up and used in laboratory settings, the methods for loading samples, and how to achieve effective separation. - Chemistry Views – Column Packing
This resource covers various methods for packing chromatography columns, explaining both dry-pack and slurry methods. It also provides insights into column preparation, which is essential for ensuring efficient separation during chromatography. - Biology Insights – Gel Filtration and Affinity Chromatography
Discusses gel filtration and affinity chromatography, highlighting their applications and techniques for purifying proteins and other biomolecules.
These articles have been helpful in understanding the basics of chromatography, different column packing methods, and specific chromatography techniques that are relevant to HPLC vials and their use in the biotechnology field. Let me know if you’d like further information or if you need additional references on a particular aspect!

